Brandy Baji, Stampin' Up! Demonstrator - Hilo, Hawaii

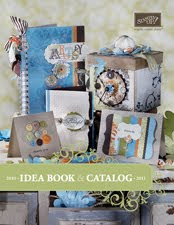
I love love love Stampin' Up! I have been in love since my first SU! Idea Book & Catalog.

I first joined Stampin' Up! in 2008, after I came across a SU! Demonstrator's blog while browsing for inspiration on a Cricut online community.
I fell in love with not just her projects, but the SU! products that were featured.

I knew immediately that I wanted to sign up as a Demonstrator. And so I did, and it was wonderful!

I dropped my SU! business while I was pregnant with my son, as I did not have the energy to keep up; however, I never gave up stamping!

After settling with my, now a baby bigger, family, I rejoined Stampin' Up! I cannot imagine being without SU! again.

I enjoy the opportunity to earn money while doing what I love, and sharing my passion and the opportunity for you to do the same.


Showing posts with label gift ideas. Show all posts

Friday, October 22, 2010

Perfect Handmade Holiday


Create Amazing cards,
Beautiful packaging,
and Cherished gifts
this holiday season!

Now until December 16, 2010, choose from these gorgeous Stampin' Up! holiday bundles- perfect for creating cards, gift packaging, tags, and gifts- all at 20% off!

If you are in Hilo, Hawaii, be sure to visit my calendar here. Classes featuring these bundles will be available in November and December. Classes are free when you purchase your bundle. All events are held at my home in Hilo, near Waiakea Intermediate School, directions will be provided upon receiving your RSVP. Seats are limited. RSVP early! Contact me with any questions.

If you are interested in classes, and are unable to make the date, consider hosting a workshop in your home or mine. Gather a few of your friends, and I will be glad to show you all how to create beautiful projects using Stampin' Up! products.

Happy Stampin'!

Saturday, October 9, 2010

BCAM Nugget Box

I have another pink project to share with you today in observance of Breast Cancer Awareness Month. I was craving chocolate all week. I went to Walmart planning to raid their Halloween candy aisle. To my surprise, there were no Hershey's Nuggets. I know they come out with special Nuggets during Christmas, and I had thought they have it during Halloween also. I could be wrong. Well, I ended up in the regular snack/candy aisle buying the small bag (good! less calories should I eat the whole bag by myself!)  My favorites are Milk Chocolate with Toffee & Almonds, Milk Chocolate with Almonds, and Cookies & Cream... Just in case you plan to send me some! Ü

Why nuggets? Yes, I know they come in full-size bars, and it's better to buy just one bar, eat the whole thing, beat myself up about it, then forget it... But I'm a crafter, and I love to wrap them!!! Ü

Lap of Luxury DSP, Acetate
Sorry, the ribbon is not from SU! I'm not sure the brand, I bought it years ago, while I was making wedding invitations

Isn't this box just darling?! I love creating boxes for chocolates. Here I used an acetate slip-on cover. A cardstock cover could easily be used also, but it's so great to see the goodies inside!  Ü

I will have to post the box instructions later. I got dimensions from somewhere and I didn't note it, but the cover didn't come out great, and I had to do the math, cut, score, and construct my own. Check back soon.

I think I may be making more of these today. That way I will stop eating them!! It's harder to eat when they're all so pretty.  Ü

Thank you for visiting. Go get yourself some chocolate... you deserve it!


Thursday, October 7, 2010

Fun Flashing Jack-o-Lanterns

If you're a follower of my blog, you know very well that I LOVE HALLOWEEN!!  Ü

I was worried that I would not be able to find an appropriate Halloween gift for my daughter to share with her classmates. She attends a Christian private school, and there are rules (which I am very thankful for) prohibiting candy, witches, ghosts, goblins, and the other fun (but still not appropriate for school, I agree) Halloween elements. I was advised that pumpkins would be allowed. I hope Jack-o-lanterns are okay, he is smiling!  Ü

Tangerine Tango, Old Olive, Rich Razzleberry, Whisper White, Wicked Fun DSP, 1 3/8" Circle Punch, 1 3/4" Scallop Circle Punch

Using my computer and home printer, I printed "Have a Safe & Happy Halloween   Jesus Shines in You" on Whisper White paper

To make the wrapper (note: it is not an enclosed box, it is open on the sides), cut DSP to 2 1/4" x 5 3/4", score at 2 1/4, 2 3/4, 5, 5 1/2. Use a 1/2" Circle Punch to make a hole at the top for the cord to come through. This will keep the jack-o-lantern from coming out of the wrapper.

I found these cute gifts at Walmart for $1. It is a necklace and there is a button on the back to switch on the blinking light. They come in orange, pink, green, and blue. The faces are all the same... smiling!  Ü

Halloween safety is important. If you don't have some type of reflector or light for your child, please get one. Again, this one is only a dollar at Walmart, but there are the orange sticker type reflectors that are under a buck for a sheet of about 10. Every year I have my kids wear a blinking light. Because they don't like it, I clip it to the back of their costume, so they don't know it is there. If you have an infant or toddler, wear the light for them. It's always better to be safe than sorry. Even if you are confident that you can keep your child safe, you can't always trust that drivers will see your child. It's scary, yes! But please be safe and enjoy your Halloween night.

Wednesday, October 6, 2010

OMG...Awesome CLEARANCE RACK BLITZ!!!

Okay, I don't visit the Stampin' Up! Clearance Rack often... until NOW!!! SU! is having a Clearance Rack Blitz. What does that mean? You save even more, now until October 18, on clearance items! Up to 80%!! It is just awesome. If you fancy getting great quality products from Stampin' Up! for cheap... You have got to check it out!


Ink, cardstock, DSP, Sizzix dies, and RIBBON & EMBELLISHMENTS galore! Pretties kit, corduroy brads (great for holiday card making and scrapbooking!), build-a-brads, and ribbons- double-stitched, taffeta, gingham, striped, polk-a-dot... OMG! Just check it out for yourself here. Click Shop Now on the bottom of the page, and browse the Clearance Rack.

One of my all-time SU! favorite colors is Chocolate Chip... and there is so much Chocolate Chip yum! yum! clearance goodies!!! Some are under $2!! I better get on it before they run out... It's while supplies last, so check it out today!!

I'm so excited! Can you tell? Count the exclamations. Ü

Gotta go shop. You should do the same Ü

Thanks for visiting!

Tuesday, September 14, 2010

Notepads!!!

I've been invited to participate in a craft fair in November. I'm unsure whether I will participate or not. I was thinking of maybe having a garage/craft fair at my home once a month or every other month. I have a huge yard and garage, lots of street parking, and a nice and quiet neighborhood. Well, whatever I decide, I will have to have handcrafted items.

I started making these notepads for my own desk (Lord knows I go through lots and lots of scratch paper!) And once it started to look like a set, I began considering making more, for gifts or sell.   Ü


Real Red, Old Olive, Play Date DSP, Tart & Tangy Stamp Set, Apple Blossoms Stamp Set, 5/8" Old Olive Grosgrain Ribbon, 1/4" Whisper White Ribbon

The notepad are junior legal pads that I picked up at Office Max. I took the package of 12 to their Impress counter, and had them cut the pads in half. It costed me a dollar and change to cut all 12. Now they are perfect for shopping lists, Christmas lists, to-do lists, Stampin' Up! to-buy lists  Ü (LOL... had to put that one in there!) 

The post-it pad is adhered to Play Date DSP-covered chipboard coaster. I got 100 of these 4x4 coasters on eBay for $16. Tombow-ed it onto the chipboard, sanded the sides and corners. It's not shown, but I covered a medium binder clip with DSP and adhered the cherry-stamped scallped circle. When clipped to the pad holder, it can hang from a push pin or nail on a wall or bulletin board. The pen is a Pentel RSVP pen. I took out the ink thingy (what do you call it if it isn't yet a refill?), wrapped it with DSP, and reassembled. The best thing about this pen is that all you have to do is buy refills, slide one in, and you will still have the same cool pen to match your notepads. The DSP is not glued in any way to the pen. It just sits pretty in there.  Ü  Love it! Although I show it here that the pen is clipped to the coaster, it can also be hang from the binder clip.

I will have a tutorial up for this soon. But if you have any questions at all, please feel free to contact me.

Thanks for stopping by!

Thursday, September 9, 2010

I Don't Like to Share Ü

It's Football (& Fantasy Football!) Season... Yay?! Usually I am quite excited about football. I love a good excuse to spend a day in the kitchen making yummy foods for my husband to grind while he's ogling men in tights. Ü

But this year, my hubby's computer is broken... so I have to share. And he's a HOG, I tell you!! I haven't been blogging as often because of it. (Boo.) But I do work while he's on the computer.

I'm not tired of playing with Halloween stuff yet. I was so happy to see a Halloween section at Walmart in Hilo; but disappointed at how small the section is. If you live on the Big Island, and know where I can get cool Halloween decorations, please let me know. Online suggestions are good, too. Yes, it's still September, I know, but I always like to start early! On October 1, you can count on my front door being covered in faux cobwebs, pumpkins in my front yard, and the Halloween doormat that makes ghoul sounds when you step on it (I bought it last year, but I wasn't able to use it in apartment building we lived in). Ü

I got my daughter psyched about it all, too. She thought Halloween was next week! Hehe. Well, I hope Walmart starts stocking up on the goodies, otherwise, I may have to fly to Honolulu for some... Oooh, maybe I can have my mom bring some on her next business trip to Hilo. Okay, enough blabber...

I did find these at Walmart! They were screaming at me, "Buy me! I have potential! I'm boring! Give me life!" Ü LOL.


Basic Black, Nite Owl DSP, Fangtastic Stamp Set, 1/4" Pumpkin Pie Grosgrain Ribbon, Natural Hemp Twine, 1 3/8" Circle Punch, 1 3/4" Scallop Circle Punch
Candy Corn Containers from Walmart

I am amazed that I only bought these three containers, and none of them are open! I like candy corn, but I can only eat two or three before I feel like I've had too much sugar. But I have two little ones, and they have not attempted to open it yet. Hmmm... I feel like a great mother right now... So proud! Ü

I'll be on the hunt for more Halloween gift projects. I have bag toppers, candy bar wrappers, and candy holders/boxes on my to-do list. Check back often or subscribe to receive my blog posts by email on the left side panel.

Tuesday, September 7, 2010

Here it is...

This weekend I moved my craft room into a bigger room in my house. Ü I'm so in love with it! I will have to get pictures up soon. It is my master bedroom. (Did I hear you gasp?!) My husband offered for me to transfer my things to the master bedroom, so that I can have more space, and I can host my workshops and classes in there, since it's more roomy and it has its own bathroom. My garage has no windows and is very very hot, and I hate to kick my family out of their own house while I have stampers over.

Because it is such a large room, it was always a mess! Too much floor space means too much junk on the floor! Ü This may be a great thing for us as a couple. Our new bedroom (old craft room) is perfect for one bed and a TV. All our clothes fit in the closet... what else do we need? Ü

Okay, I'm done justifying my big craft room move to those who are totally shocked. Ü Hehe. I love it... and if you are in Hilo, HI stop by and craft with me. Lots of room here. Again, my home is kid-friendly, nothing breakable. I have a 4-year-old girl and a 1-year-old boy, and they love love love to play with other kids.

So, here it is. I've had these pictures on my desktop for a while and they are just begging to be posted. These are my two cards Kristina's September card swap. Since I am mailing mine to Oahu, and I didn't want to send them in a ziploc bag, I made coordinating boxes for each set. To my surprise, the box fit all 13 card fronts. Ü

The first card front was to be made using a new stamp set from the 2010-2011 Idea Book & Catalog. I love this Aviary Stamp Set, and of course, Brights.... I love love love Brights!

This was more fun than I thought! At first, I thought I was going to call my husband to help cut and punch and stamp... YEAH, RIGHT! It was actually quite easy to do multiples Ü


Whisper White, Daffodil Delight, Melon Mambo, Tempting Turquoise, Old Olive, Aviary Stamp Set, Scallop Edge Punch, 1 3/8" Circle Punch, 1 3/4" Scallop Circle Punch, Sticky Strip, Snail Adhesive, Stampin' Dimensionals

I had no clue how I was going to design the box, and I am so happy with it. I am going to make a card in this exact same design. Adorable! Ü

The second card was to be made using a new stamp set in the Holiday Mini Catalog. And since it is still too early for Christmas cards for me, and I love Halloween... you know... I used the Dark & Dreary Stamp Set, Nite Owl DSP and the Spider Web Textured Impressions Embossing Folder for Sizzix Big Shot.


Can you believe I heat embossed each card? I don't know if it was a hot night or if my (old, small) craft room turned into a sauna from all that embossing!

Very Vanilla, Basic Black, Nite Owl DSP, Dark & Dreary Stamp Set, 1/4" Pumpkin Pie Grosgrain Ribbon, Whisper White Craft Ink, Basic Black Craft Ink, Clear Embossing Powder, Sticky Strip, Snail Adhesive, Stampin' Dimensionals


My card in yesterday's post also featured the embossed spider web. This box top was the first attempt and I was so excited, I made many more Ü  See yesterday's post to see how I achieved this look.

Both boxes measure 5 3/4" x 4 1/2" x 2". For the box bottom, start with a 9 3/4" x 8 1/2" sheet of cardstock, score at 2" on each side. For the top, start with a 9 1/2" x 8 1/4" sheet of cardstock, score at 1 7/8" on each side. Embellish as desired.

The box fits 6 standard 5 1/2" x 4 1/4" cards with envelopes. Perfect for gift-giving!

I will post a complete tutorial soon. Please check back often or subscribe to my blog at the left to receive my new posts featuring my samples, promotions, and giveaways FREE via email. Ü

Thursday, August 26, 2010

A Morning Cup for a Kind Friend

Did you miss me yesterday? Ü  I was not ill, I am feeling a lot better. I did work and create a beautiful card yesterday using the new Aviary Stamp Set. I was so excited to post it on my blog, when I was invited to participate in a Card Swap. I decided I would use the card I just completed. I will be sure to post the card design after the swap. I tried to get another card done, but I ended up preparing the upcoming Card Swap, and then I actually went to bed quite early.

I woke up feeling great today, but still found myself running a bit late. Usually I leave home at 7:15am, but today I loaded my kids in my truck at 7:30am (not too bad!) When I turned the key, nothing but clicks. OMG! I accepted my situation, and explained to Mariah that she would not be going to school today. Bad idea, Mom! She started to cry.

I called my mother-in-law to see if she had any suggestions, and she told me she would be over to take my daughter to school. I was unsure how this was possible, since she did not drive to work. Well, she came not more than ten minutes later. Her friend/co-worker drove her to my house to pick up Mariah and drive her 3 miles to school. I am so lucky they work not even a mile from my home.

I was so very grateful that her co-worker was kind enough to do this for my family. Ü So, I made her this card.


Crumb Cake, Early Espresso, Whisper White, Morning Cup Stamp Set, 1/4" Real Red Grosgrain Ribbon, Scalloped Edge Punch

*This layout is from this week's Mojo Monday sketch. (Another blog I visit for inspiration! Ü)

I normally don't design the inside of a card, but while I was stamping my name stamp on the back, the inside brushed the edge of my ink pad. I had to cover up the boo-boo! Ü

I planned to enclose a Starbucks Gift Card, so at the last minute, I made a gift card holder for the top half of the inside. I wish I had taken a picture of it, it was just perfect.

In case you were wondering, my truck is doing better. My father-in-law (aren't my in-laws wonderful?!) cleaned up my battery, got my truck started, and I only had minor start problems throughout the day. And now, as I blog, my husband is putting a brand new battery in! Ü Yay! Tomorrow, it should be running cherry!

Hope you enjoyed this card... it is absolutely perfect for coffee joint gift cards!

Tuesday, August 24, 2010

"TEA"rific

Tonight I am starting to feel under the weather. I feel a cold coming on... not good! I made myself a cup of black tea, and came to my stamp room to clear my mind of germs and illness. Yuck! To complete the theme, I brought out my Morning Cup stamp set. My first thought was that it would be cool to have a holder that fit my tea bags. Envelopes were too big and I didn't want to make a card with pockets and ribbon.

Thinking about projects I've complete in the past, I remembered Matchbook Folders. So simple to make, requires only half a sheet of cardstock and scraps.

Matchbook Folder Front: Stamped in Early Espresso, Colored & Blended with Watercolor Pencils
Top flap tucks into the bottom to close
Tea bag fits perfectly. This project can also be used to hold candy/chocolate.
 
Crumb Cake, Very Vanilla, Morning Cup Stamp Set, Old Olive Brads, Watercolor Pencils, Blender Pen, Sticky Strip

Crumb Cake Cardstock was perfect for this project. If you click on the pictures, you may notice the fibers in the paper (SU! Cardstock is made with recycled paper). It greatly resembles an actual matchbook.

I am hoping to have a tutorial posted for this soon. If you cannot wait, contact me to attend a stamp class. I would love to teach you how to complete this fast and simple project! Ü

Rush Job: Imperfection is Perfect!

Ü I can't stop giggling. This morning, my 4-year-old girl saw the framed page I posted yesterday. She asked me questions about her brother and the train set. But, it wasn't until we got into the truck to go to school, she asked me, "Mommy, where's my pictures?" I wasn't sure what she was talking about... "Like Braddah and the trains. Are you going to make for me, too?" I told her, "Of course!" ... "You're going to have it when I come home from school?!"

"Oh, babes! Rush job is gonna cost you extra!" Ü

I should have known better. When you have more than one child, everything has to be duplicated!

I made her this 12x12 Scrapbook Page using her favorite Stampin' Up! colors and her favorite stamp set. (Yes, I allow my daughter to craft with me! Ü) It's not embellished much, because I rushed it. I still intend on making one with a hula girl theme, so this page won't be in this frame for very long. She'll love it!

Tempting Turqoise Textured Cardstock, Melon Mambo, Pumpkin Pie, Whisper White, Cottage Garden Stamp Set, 5/8" Old Olive Grosgrain Ribbon, 1/4" Whisper White Grosgrain Ribbon, Hodgepodge Hardware- Very Vanilla, 1 3/8" Circle Punch, 1 3/4" Scallop Circle Punch

This is the same 12x12 picture frame from Ben Franklin Crafts, $7 each.

This was not my original layout. I dropped an open ink pad on the page, and I was forced to move things around to cover up the spill Ũ.

One of the greatest things about crafting is that imperfection is perfect. The little smudges of ink, differences in pressure, and uneven lines are all evidences of love's labor.

Monday, August 23, 2010

Chug-A-Chug-A ... Choo! Choo!

Man! I missed blogging this weekend. Friday was a State Holiday, and my parents were visiting from Honolulu, so I was unable to get any time in my stamp room. But I had a great time! I meant to raid my dad's camera for pics before he left tonight, but I totally forgot. I'll have him send me a CD.

We went to the Pana`ewa Rainforest Zoo & Gardens, Hawai`i Volcanoes National Park, and spent an entire day at my grandma and brother's house. My kids had so much fun, and they (me, too!) are so exhausted. It was a wreck trying to get my daughter out of bed this morning. Ü

Today was a busy day also, but I completed my 12x12 Choo Choo Scrapbook Page. Click here to see my first layout. I kept the same layout, only added one more 3 1/8" square, and stamped another set of tracks with the Right on Track Stampin' Around. I decided not to journal on the page, because I wanted to frame this project.


I bought two of these white frames at Ben Franklin Crafts in Hilo for $7 each. I gave much thought to embellishing this frame, but I chose not to, because I plan to change the page as my son grows, and this page will end up in a scrapbook for safekeeping. Ü  I also have a lot more pictures of Isaiah and his train set, so I will make another page to go alongside this in the scrapbook.

Since I bought two of the 12x12 frames, it would only be fair that I use the other one to frame a page of Mariah. Right now she really enjoys hula, and I will build on that theme. I will need to take some pictures of her with her hula skirt.

It's so sad, I used to take so many pictures of my kids. Now, I rarely bring my camera along, and my Blackberry takes horrible pictures! I have thousands of pics on my computer, and I must only actually have a fifth of them printed... And those are still in the print envelopes. I gotta get back on it! Ü

Tuesday, August 17, 2010

Hostess Exclusive: Silhouette Sentiments

This set is just so lovely. If you like this stamp set, you can earn it for free by hosting a a workshop with $150 or more in sales, or join my stamp club and get your turn at receiving free hostess rewards.

The Silhouette Sentiments stamp set was perfect for this 3x3 card holder and cards. This holder is 3 1/4" x 3 1/4" with a depth of 1" and holds 12 cards (no envelopes) or 6 cards (with envelopes). Mine currently holds 12, 3 each of 4 designs.


Whisper White, Rich Razzleberry, Old Olive (Textured & Smooth), Silhouette Sentiments Stamp Set, 5/8" Old Olive Grosgrain Ribbon, 5/8" Rich Razzleberry Grosgrain Ribbon, Stampin Dimensionals, Sticky Strip, Snail Adhesive

What I really like about this set is that it is really clean and pretty. I think it looks best in bright, bold colors. I played with the subtles, but it was just too wimpy (sorry, I lack a better word!) Ũ

I will have a tutorial on how to construct this set soon. Check back often! Ü

Monday, August 16, 2010

Always & Forever

My husband and I have been together for 9 years today. Every year on this day, I go through our old photos. This year, I made an 8x10 to be framed and displayed in our home.

Love Letter DSP, Very Vanilla, Basic Black brads

We celebrate today, rather than our wedding date (Christmas Eve), because the change in our relationship from "just good friends" to something more was extra, extra special. I am truly grateful that I will have Always & Forever with my Best Friend.

Happy Anniversary, Michael!


Thursday, August 12, 2010

I LOVE/HATE Love Letter DSP!!

When I don't know what to do with a certain something, I ignore it. I had a pack of Love Letter DSP at the bottom of my DSP stack. Last night, I opened it, looked through the different designs, and wondered if I was half asleep when I ordered it. This DSP is not at all my style. For the first 30 minutes, I hated it!!! I had no clue where to start. The colors, blah, the prints, blah, the matching stamp set... well, I didn't buy the matching stamp set. Ü Hehe. I continued to just stare at them... literally!

This morning, I looked over them again, "classic" came to mind, and all I could think of was wallpaper! I started to hate more. Called "Love Letter," I would never write a love letter with this!

I was very proud that I didn't put it back on the bottom of the stack. I refused to give up. I was tracing my fingers along the designs, and I started to notice the shapes, the patterns, the symmetry... Okay!

I played with it for hours, and now I LOVE IT!!! Concentrating on the shapes and patterns (not the colors and designs), I was able to find wonderful things. Working with the shapes and patterns made me feel like I was doing geometry homework! (I really like geometry Ü )

Basic Black, Riding Hood Red, Very Vanilla, Whisper White, Love Letter DSP, All Holidays Stamp Set


3 1/4" x 3 1/4" Box, fits 8 3x3" note cards & envelopes

I cut out the designed circle from the Very Vanilla DSP and layered it out on the Riding Hood Red DSP with Stampin' Dimensionals

I used a 5/8" Satin Ribbon in Basic Black across the center.

Stamped using All Holidays Stamp Set

This was fun! I used the same corner on each color DSP to cut a square, then cut each square diagonally, and placed them together to create one two-toned design.

I have a few more ideas for the Love Letter DSP, but since I have a Stampin' Up! delivery coming tomorrow, I don't think I will be playing with it again for a while. Ü 

What a Tease!!

I was working in my stamp room, which is at the front of my house closest to the road that connects to my street (I live on the corner.) I heard a truck slow down as it passed my room and turn onto my street. It stopped suddenly, and immediately I knew it was the FedEx guy. I practically stalk the man when I'm expecting a delivery, I know the sound of his truck!! My order is expected to be delivered tomorrow, so I got excited and ran to the front door. Yup! It was him... but for my next door neighbor!!! Nuts, that's what I am... I can't ever wait to get my new stuff. Ü

Moving on to my first project of the day... These mini milk cartons are so adorable! I learned a couple of months ago how to make it, and only now tried to actually create with it. I measure, score, cut, and fold. The Sizzix template is awesome, too; but I haven't yet bought myself a Sizzix Big Shot. I have been a Cricut Expression owner since before joining Stampin' Up! and I have no room in my home for another die cutting machine and all its parts.


Early Espresso, Poppy Parade, Marina Mist, Play Date DSP, Got Treats Stamp Set

The main body of this milk carton is a 2.5" cube. It can fit quite a bit of goodies in there. I may have to shrink the template for my next milk carton. A tutorial to come soon. Check back often.

Wednesday, August 11, 2010

Didn't I Say That I Loved It?!

I love love love the Sunny Garden DSP so much I couldn't even wait 24 hours before using it again! I have had this cardboard/chipboard frame for a few months now. I bought it at Ben Franklin in Hilo at 75% off, plus my BF Craft Club discount. It was a steal, and I am not regretting not buying more than one. I have great gift ideas for this product. It is a 16x16 frame that holds a 4x6 photo. I covered it with a corkboard tile, and well, you can see for yourself...

It's quite heavy. I'm not yet sure how I'm going to hang this up Ũ


Cardstock: Peach Parfait, Blushing Bride, Sunny Garden DSP
Stamp Set: Cottage Garden


5/8" Grosgrain Ribbon Old Olive

Sunny Garden DSP to cover binder clip, hanging from push pin embellished with Cottage Garden Stamp Set butterfly.


Last, but definitely not the least, my `ohana.

I just checked BF's ad for the month. They have 12x12 frames on sale. I have about (12) 12x12 magnet, chalkboard, and corkboard tiles that I bought last month for under $2 each. I may just be using them this month. Yay! Check back later to see how those turn out. I think I'll play with the Play Date DSP again. Ü